Wallpaper Installation Step-by-Step
Table of Contents
Selecting the Perfect Wallpaper for Your Space
When it comes to selecting the perfect wallpaper for your space, there are a few key factors to consider. First and foremost, think about the overall aesthetic you want to achieve. Are you looking for a bold and statement-making design, or do you prefer something more subtle and understated? The color palette and pattern of the wallpaper should complement the existing decor and furniture in the room. Additionally, consider the size of the space and the amount of natural light it receives. Lighter colors and smaller patterns can help to make a room feel larger and brighter, while darker colors and larger patterns can create a cozy and intimate atmosphere.
Another important consideration when selecting wallpaper is the durability and maintenance requirements. If you have children or pets, it’s best to choose a wallpaper that is washable and can withstand everyday wear and tear. Additionally, think about the longevity of the design. Classic and timeless patterns will ensure that your wallpaper remains stylish and relevant for years to come. Finally, don’t forget to take into account your personal taste and style. Your home should be a reflection of your personality, so choose a wallpaper that speaks to you and makes you feel inspired and happy. With these considerations in mind, you’ll be well on your way to selecting the perfect wallpaper for your space.
Understanding the Importance of Proper Wall Preparation
Proper wall preparation is a crucial step in ensuring a successful wallpaper installation. Without it, your beautiful new wallpaper may not adhere properly, leading to unsightly bubbles, peeling, or even premature damage. One essential aspect of wall preparation is cleaning. Dust, dirt, and other debris can create barriers between the wallpaper and the wall surface, preventing proper adhesion. Therefore, before applying wallpaper, it is important to thoroughly clean the walls using a mild detergent and water solution. Additionally, any existing wallpaper or flaking paint should be removed to create a smooth and clean surface for the new wallpaper.
Another crucial aspect of wall preparation is priming. Priming the walls creates a smooth and stable base for the wallpaper to adhere to, ensuring a long-lasting and professional-looking result. Using a primer specifically designed for wallpaper application will not only enhance the adhesive properties but also help to seal any porous surfaces, preventing adhesive absorption and ensuring a stronger bond. It is important to apply the primer evenly and allow it to dry completely before moving forward with the wallpaper installation. Taking the time to properly prepare your walls will not only make the installation process smoother but also contribute to the durability and longevity of your wallpaper.
Tools and Materials Required for a Successful Wallpaper Installation
Before you embark on your wallpaper installation project, it is important to gather all the necessary tools and materials for a successful outcome. First and foremost, you will need a tape measure to accurately measure the dimensions of your walls and determine the amount of wallpaper needed. Additionally, a level will ensure that the wallpaper is applied straight and even. A utility knife or wallpaper cutter will be essential for cutting the wallpaper to the correct size, while a smoothing brush or roller will help eliminate bubbles and creases during application. Other tools to consider include a pencil for marking the walls, a ladder or step stool for reaching high areas, and a wallpaper brush for pressing the paper firmly into place.
In terms of materials, wallpaper adhesive or paste is crucial for adhering the wallpaper to the walls. Make sure to choose the appropriate adhesive for the type of wallpaper you have selected, whether it is pre-pasted or requires separate adhesive. A bucket and stirring stick will be necessary for mixing the adhesive according to the manufacturer’s instructions. Additionally, you will need a sponge or damp cloth for wiping away excess adhesive and smoothing the wallpaper. Finally, don’t forget to stock up on drop cloths or plastic sheeting to protect your floors and furniture during the installation process. By having all the right tools and materials at your disposal, you will be well-prepared to tackle your wallpaper installation project with confidence.
Step-by-Step Guide to Preparing Your Walls for Wallpaper Installation
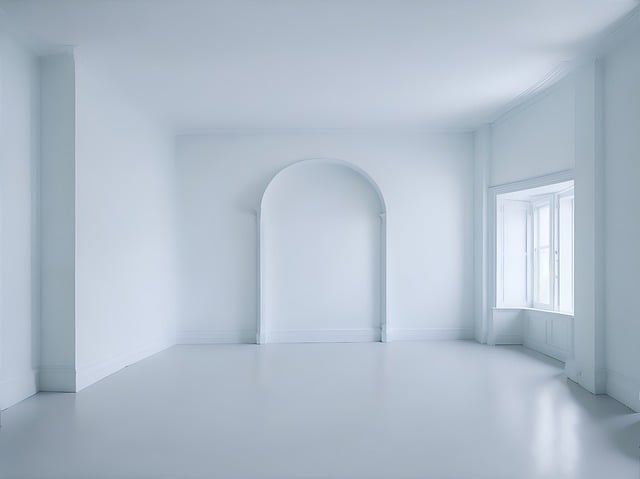
Before you can begin the exciting process of wallpaper installation, it is crucial to properly prepare your walls. This step-by-step guide will help ensure that your wallpaper goes on smoothly and lasts for years to come. The first step is to clean the walls thoroughly. Use a mild detergent and warm water to remove any dirt, grease, or stains. Once the walls are clean and dry, inspect them for any imperfections such as cracks, holes, or uneven surfaces. Fill in any cracks or holes with spackling paste, and use sandpaper to smooth out any uneven areas.
Next, it’s time to prime the walls. Applying a primer will create a smooth and durable surface for your wallpaper to adhere to. Choose a high-quality wallpaper primer that is compatible with the type of wallpaper you will be using. Apply the primer evenly using a roller or brush, and allow it to dry completely before proceeding. Once the primer is dry, inspect the walls once again to ensure they are smooth and free of imperfections. Sand down any rough areas if necessary before moving on to the next step. With your walls properly prepared and primed, you are now ready to move on to the exciting part of installing your chosen wallpaper.
Techniques for Smooth and Bubble-Free Wallpaper Application
Achieving a smooth and bubble-free wallpaper application requires proper techniques and attention to detail. Before starting the installation process, it is crucial to ensure that the wall surface is clean, dry, and free from any imperfections. Use a sanding block to smooth out rough areas and remove any old paint or wallpaper residue. It is also essential to fill in any cracks or holes with spackle and allow it to dry completely. By preparing the walls adequately, you create a smooth canvas for the wallpaper and minimize the risk of bubbles or wrinkles.
When it comes to applying the wallpaper, start from one side of the wall and work your way across. Use a wallpaper brush or smoother to push out any air bubbles as you go. Begin at the top and slowly move down, smoothing the wallpaper as you progress. It is crucial to ensure that the wallpaper is aligned correctly and matches up with the pattern or design. If there are any bubbles or wrinkles that appear after application, gently lift the wallpaper and reposition it, making sure to smooth out any imperfections. By using these techniques, you can achieve a flawless and bubble-free wallpaper application that enhances the overall aesthetic of your space.
Tips and Tricks for Matching Patterns and Aligning Seams
Matching patterns and aligning seams is a crucial step in achieving a professional-looking wallpaper installation. To ensure a seamless look, it is essential to pay attention to the pattern repeat and match. When selecting wallpaper, be sure to consider the pattern repeat measurement to determine the quantity needed for your project. This measurement indicates how far the pattern motif will move vertically before repeating.
To align the patterns seamlessly, start by analyzing the design of the wallpaper. Look for unique elements or motifs that can serve as reference points for matching. Begin applying the first strip of wallpaper, making sure it is level and aligned with any prominent features on the wall, such as a door frame or window. As you hang subsequent strips, carefully match the pattern at the seams by overlapping or butting the edges together, depending on the design. Use a seam roller or a clean, damp sponge to smooth out any air bubbles or excess adhesive, ensuring a flawless finish. By paying attention to pattern repeats and taking the time to align seams accurately, you can achieve a professional-looking wallpaper installation that enhances the beauty of your space.
Remember, the key to successful pattern matching and seam alignment is patience and attention to detail. Take your time to carefully line up the patterns, ensuring they flow seamlessly from one strip to another. If the wallpaper has a complex design, it may be helpful to cut and match small sections before applying them to the wall. This will give you a better understanding of how the pattern aligns and allow for adjustments before committing to the final application. Additionally, using a sharp utility knife and a straightedge can help achieve clean and precise cuts, ensuring that the edges of the wallpaper align seamlessly. With practice and careful execution, you can master the art of matching patterns and aligning seams, creating a stunning wallpaper installation that adds character and style to your space.
Dealing with Common Challenges During Wallpaper Installation
One common challenge that homeowners may encounter during wallpaper installation is air bubbles. These pesky bubbles can occur when the wallpaper is not smoothed out properly or when air is trapped underneath during the application process. To prevent this issue, it is important to thoroughly clean and dry the wall surface before installing the wallpaper. Additionally, using a smoothing tool or a flat-edged object can help to push out any air bubbles and create a smooth, even finish.
Another challenge that may arise is the misalignment of wallpaper patterns and seams. It can be frustrating to see a misalignment in the pattern or visible seams that disrupt the overall look of the wallpaper. To avoid this, it is crucial to accurately measure and mark the starting point for the wallpaper installation. Taking the time to carefully align the pattern and match the seams can greatly improve the final result. Using a straight edge and a sharp utility knife can also assist in trimming excess wallpaper and creating clean, seamless edges. Finally, ensuring that the adhesive is evenly applied can aid in minimizing any visible seams.
How to Properly Trim and Finish Wallpaper Edges
Once you have successfully installed wallpaper on your walls, it is important to properly trim and finish the edges to achieve a polished and professional look. To start, you will need a sharp utility knife or a wallpaper trimming tool, a metal straight edge or a wallpaper cutting guide, and a wallpaper smoothing brush or a clean, damp sponge.
Begin by using the straight edge or cutting guide to create a straight and even line along the edge of the wallpaper. Press the straight edge firmly against the wallpaper and carefully cut along the edge using the utility knife. Make sure to use steady and controlled movements to avoid tearing or damaging the wallpaper. Once the excess wallpaper is removed, gently brush or sponge the trimmed edge to ensure that it is securely adhered to the wall.
Caring for and Maintaining Your Wallpaper for Longevity
To ensure that your wallpaper lasts for years to come, proper care and maintenance are essential. Regular cleaning is key to keeping your wallpaper looking fresh and vibrant. Start by removing any dust or dirt using a soft brush or a vacuum cleaner with a brush attachment. Gently sweep the surface of the wallpaper, being careful not to apply too much pressure to avoid damaging the design. For stains or more stubborn dirt, use a mild cleaning solution made specifically for wallpapers. Test the solution on a small, inconspicuous area first to ensure it doesn’t cause any discoloration or damage. Apply the solution with a soft sponge or cloth, working in a gentle, circular motion. After cleaning, make sure to wipe away any excess moisture with a dry cloth to prevent water damage.
In addition to regular cleaning, protecting your wallpaper from excessive humidity is crucial for its longevity. High humidity levels can cause the wallpaper to peel or warp over time. To maintain a healthy level of humidity in your space, consider using a dehumidifier or ventilation system, especially in areas with a tendency for moisture, such as bathrooms or kitchens. Additionally, avoid placing furniture or objects directly against the wallpaper, as this can trap moisture and lead to mold or mildew growth. Keep an eye out for any signs of peeling or lifting edges and address them promptly to prevent further damage. By following these care and maintenance tips, you can enjoy your beautiful wallpaper for years to come.
Hiring Professional Help: When to Consider Wallpaper Installation Services
Hiring professional help for wallpaper installation services can be a wise decision in certain circumstances. While many homeowners may opt to take on the task themselves, there are times when calling in the experts is the best choice. One such situation is when dealing with complex patterns and intricate designs that require a high level of precision. Professional installers have the experience and expertise to match patterns seamlessly and align seams flawlessly, ensuring a stunning end result. Additionally, if you have limited time or lack the necessary tools and materials, hiring professionals can save you both time and effort. They come equipped with all the necessary tools, such as adhesive, brushes, and rollers, and can complete the job efficiently and effectively.
Another instance where professional help may be warranted is when you are dealing with challenging wall surfaces. Uneven or damaged walls can present obstacles during the installation process, making it difficult to achieve a smooth and professional-looking finish. Professional installers have the knowledge and skills to properly prepare and repair walls, ensuring a solid foundation for the wallpaper. They can handle common issues like cracks, holes, and existing wallpaper removal, providing a smooth surface that will enhance the overall appearance of the installed wallpaper. By entrusting the job to professionals, you can have peace of mind knowing that the installation process will be handled with care and expertise, resulting in a stunning transformation for your space.

