Low-cost plastering methods
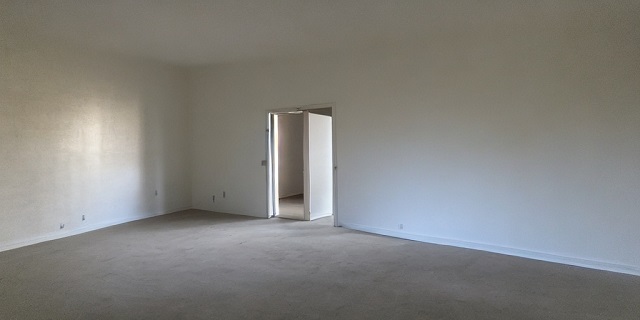
Table of Contents
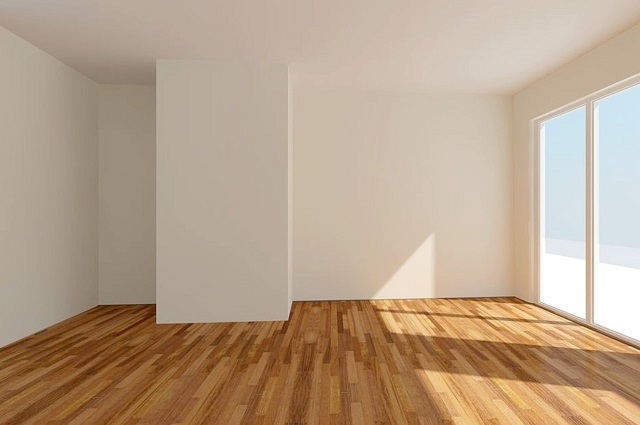
Preparing the Surface
Removing years of grime and old paint can seem like a daunting task, but fear not! Begin by arming yourself with a trusty scraper and some sandpaper. Tackle those rough patches and flaky bits with gusto – think of it as a mini-workout for your arms! Once you’ve got the surface nice and smooth, give it a wipe down with a damp cloth. You’ll be amazed at how much brighter the room will feel when the walls are clean and prepped.
Now, check for any cracks or holes that need a little TLC. A quick patch-up job using some spackling paste will have your wall looking good as new in no time. Don’t be afraid to get your hands a little dirty – it’s all part of the DIY fun! Once you’re satisfied with the repairs, take a step back and admire your handiwork. You’re on your way to a beautifully prepped surface ready for some fresh plaster magic!
Assessing the condition of the wall
Upon first glance, take note of any visible cracks, chips, or areas where the paint is peeling. Run your hand along the surface to feel for any unevenness or rough patches. Don’t be afraid to get up close and personal with the wall; sometimes imperfections can be subtle.
Next, tap the wall gently with your knuckles. Listen for any hollow sounds, which could indicate delamination or loose plaster. Keep an eye out for water stains or mold spots as well, as these could signal underlying issues that need to be addressed before plastering. Remember, a thorough assessment now can save you from headaches down the road.
Cleaning and repairing any damages
If your wall is looking a bit worse for wear, it might be time to roll up your sleeves and show it some TLC. From small cracks to larger dents, these imperfections can bring down the overall look of your space. But fret not, with a bit of elbow grease and some simple repair techniques, you can have your walls looking as good as new in no time!
Start by giving your walls a once-over to assess the extent of the damage. Are there hairline cracks or more significant chips and holes? Don’t be overwhelmed, as most blemishes can be easily fixed with the right approach. Grab a putty knife, some spackling compound, and sandpaper, and you’ll be well on your way to smoothing out those rough spots and creating a perfect canvas for your plaster application.
Choosing the right materials for cost efficiency
When it comes to plastering on a budget, selecting the right materials is key to keeping costs in check while ensuring a quality finish. Clay-based plasters offer a wallet-friendly option that is not only cost-effective but also provides a natural and breathable surface. These plasters are made of earthy materials like clay, sand, and fibers, making them a sustainable choice that can add warmth and texture to your walls without breaking the bank. Plus, their ease of application and minimal need for additional coats can save you both time and money in the long run.
If you’re looking for a more affordable option that still delivers on durability and versatility, lime plaster is a great choice. Made from a mixture of lime, sand, and water, lime plaster is known for its strength and flexibility, making it a suitable option for a wide range of surfaces. Not only does it have a long lifespan, but lime plaster also has antimicrobial properties that can help in maintaining a clean and healthy environment in your home. By opting for lime plaster, you can achieve a stylish and budget-friendly finish that stands the test of time.
Choosing the Plaster
When you step into the world of plastering, the sheer variety of options can leave you feeling like a kid in a candy store. Venetian plaster, lime plaster, gypsum plaster – it’s like trying to pick your favorite flavor of ice cream! Each type has its own unique characteristics to consider, from durability to texture, so take a deep breath and let’s break it down.
Picture this: you’re standing in the aisle of the home improvement store, staring at shelves filled with tubs and bags of plaster. Do you go for the traditional gypsum plaster for its affordability and versatility, or do you take a leap of faith and try out the trendy Venetian plaster for its luxurious finish? Remember, each plaster has its own personality and purpose, so think about what fits your project best – whether it’s a quick touch-up or a statement wall that wows.
Types of affordable plaster options
If you’re on a tight budget but still want to give your walls a fresh look, there are a few affordable plaster options to consider. One popular choice is lime plaster, which is not only cost-effective but also offers a unique texture and natural appearance. Another option to explore is clay plaster, known for its eco-friendly composition and easy application. These types of plasters can add character and warmth to your space without breaking the bank.
If you’re looking for something more budget-friendly, cement plaster is a practical choice. It is durable, easy to work with, and provides a smooth finish that can be painted over. Gypsum plaster is another affordable option that offers good adhesion and breathability for your walls. By exploring these different types of plasters, you can find the one that suits your needs while keeping your expenses in check.
Considerations for selecting cost-effective plaster
When it comes to choosing plaster for your project, cost is a significant factor. You want to make sure you’re getting the best bang for your buck without compromising on quality. Consider how much area you need to cover and the thickness of the plaster required. This will help you determine how much material you need to purchase, preventing wastage and excess spending.
Another key consideration is the drying time of the plaster. Opt for a product that dries efficiently but still gives you enough time to work with it before it sets. By choosing a plaster with a balance of quick drying time and workability, you can save on labor costs and ensure a smooth application process. Take your time to compare different options available in the market to find the most cost-effective solution for your plastering needs.
Mixing and preparing the plaster
So, you’ve got your plaster ready, and now it’s time to mix it up. Grab a bucket that you don’t mind getting a bit messy, pour in the plaster mix, and then slowly add water while stirring. Make sure to follow the instructions on the packaging for the correct ratio of plaster to water. You want a nice smooth consistency, like pancake batter, not too thick and not too runny.
Once your plaster mix is all smooth and ready to go, take a deep breath and get ready to start applying it to the wall. Some people like to use a trowel or a putty knife for this part, but honestly, you can even use an old credit card if you’re in a pinch. Start at the top and work your way down in smooth, even strokes. Don’t worry if it’s not perfect on the first go – practice makes perfect, and you can always go back and smooth things out later. Just remember to work methodically and take your time to ensure a great finish.
Application Techniques
Step-by-step guide to applying plaster: Once you’ve prepped the surface and chosen your plaster, it’s time to dive into the application process. Start by mixing your plaster according to the manufacturer’s instructions. Remember, getting the consistency just right is key to a successful finish. Grab your trowel and begin applying the plaster in even strokes, working from one section to the next. Don’t rush this step – take your time to ensure a smooth and uniform coat.
Tools needed for low-cost plastering: You don’t need fancy gadgets to get the job done when it comes to plastering on a budget. Basic tools like a trowel, plastering hawk, and a bucket for mixing the plaster are all you really need. If you’re feeling a bit fancy, you could invest in a corner trowel for those hard-to-reach areas. Remember, it’s all about technique rather than the tools you use. With a little practice and patience, you’ll be able to achieve a professional-looking finish without breaking the bank.
Step-by-step guide to applying plaster
Alright, so you’ve picked out your plaster and you’re ready to get that wall looking good as new. First up, make sure the surface is clean and free of any dust or debris. You don’t want any lumps or bumps ruining your smooth finish.
Next, mix up your plaster according to the instructions on the packaging. It’s kind of like baking a cake – you want to get the consistency just right. Once it’s all good to go, start applying the plaster to the wall in smooth, even strokes. Don’t rush it though, take your time and enjoy the process. And there you have it, a freshly plastered wall that looks like a pro did it – all at a fraction of the cost!
Tools needed for low-cost plastering
When diving into the world of low-cost plastering, it’s essential to have a few basic tools at your disposal to get the job done without breaking the bank. Let’s start with the basics: a trowel, hawk, and sponge are your best friends when it comes to applying and smoothing out plaster. These tools are inexpensive and can be used for multiple projects, making them a wise investment for your DIY arsenal.
Additionally, having a utility knife, sandpaper, and a bucket for mixing plaster are key components to ensure a successful plastering project. These tools help you refine and perfect the finish of your plaster, giving your walls a professional look without the hefty price tag. Remember, while it’s tempting to splurge on fancy equipment, sometimes the simplest tools can yield the most impressive results.
Tips for achieving a smooth finish without expensive equipment
Achieving a smooth finish on your plastered walls doesn’t have to break the bank. With just a few tricks up your sleeve, you can transform your walls without splurging on expensive equipment. One cost-effective tip is to make sure your plaster mix has the right consistency – not too runny or too thick. This can help you achieve a smooth finish with minimal effort.
Another budget-friendly hack is to sand down any imperfections on the dried plaster using a fine-grit sandpaper. This simple step can make a world of difference in achieving a flawless surface without the need for pricey tools. Additionally, using a damp sponge to gently smooth out any rough spots can provide a professional-looking finish without the hefty price tag.
Finishing Touches
With a few budget-friendly finishing touches, your plastering project will truly shine. Consider adding a splash of color with a fresh coat of paint or experimenting with different textured finishes like stucco or Venetian plaster. These simple additions can elevate the look of your walls without breaking the bank. Don’t forget to browse for inexpensive decorative elements like wall decals or stencils to personalize your space further.
When it comes to completing your project, think outside the box to maximize impact with minimal cost. Embrace the DIY spirit by repurposing old materials like wooden trim pieces or salvaged architectural elements to create unique accents. Sometimes, the most remarkable finishing touches emerge from unexpected sources, so let your creativity run wild as you put the final stamp on your plastering masterpiece.
Exploring cost-effective options in home improvement
As we delve into the realm of home improvement on a budget, the options can often seem overwhelming. From choosing the right materials to mastering application techniques, the process can feel like navigating a labyrinth of decisions. However, fret not, as there are numerous cost-effective strategies that can transform your space without breaking the bank.
One key approach is to explore DIY solutions that harness the power of creativity and resourcefulness. By repurposing existing materials or seeking out budget-friendly alternatives, you can infuse your home with charm and character while keeping costs in check. Additionally, tapping into online tutorials and community forums can provide invaluable insights and inspiration for cost-effective home improvement projects.
Enhancing skills in budget-friendly plastering techniques
Budget-friendly plastering techniques are all about getting the job done without breaking the bank. When it comes to enhancing your skills in this area, think outside the box. Consider using unconventional tools like old credit cards or plastic spatulas to achieve a smooth finish without spending a fortune on expensive equipment. You’d be surprised at how effective these makeshift tools can be in creating a professional-looking plaster wall.
Another cost-effective tip is to make your own plaster mix using simple ingredients like gypsum powder, sand, and water. By experimenting with different ratios, you can create a custom mix that suits your specific project needs while keeping costs low. Don’t be afraid to get creative and think resourcefully when it comes to mastering budget-friendly plastering techniques.