Drywall Taping Like a Pro
Table of Contents
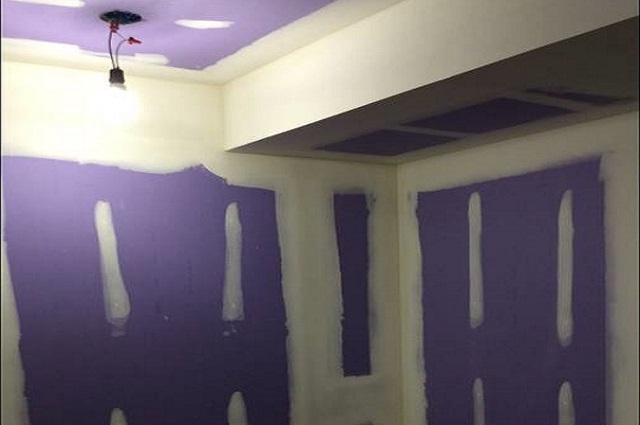
Proper Preparation of Drywall Surface for Tape Application
Drywall taping is a crucial step in the process of finishing walls and ceilings. It requires skill and precision to achieve a smooth, seamless finish. Whether you are a professional contractor or a DIY enthusiast, mastering the art of drywall taping will greatly enhance the overall appearance of your project.
Proper preparation of the surface is crucial for achieving a seamless and professional finish. Neglecting this step can lead to adhesion issues and compromise the overall quality of the project. To ensure a successful taping process, follow these steps to prepare the drywall surface effectively.
Before applying the tape, it is essential to inspect the drywall for any imperfections, such as cracks, dents, or uneven surfaces. Use a joint compound to fill in these gaps and create a smooth canvas for the tape.
Next, sand down any rough patches or excess joint compound to create a level surface. This step is crucial as it helps the tape adhere properly and prevents visible lumps or bumps. A sanding block or sandpaper can be used for this purpose, ensuring that the surface is smooth to the touch.
After sanding, thoroughly clean the surface to remove any dust, debris, or loose particles. A broom or vacuum cleaner can be used to sweep away the loose particles, followed by a damp cloth to wipe off any remaining residue. This step is critical as any trapped particles can affect the tape’s bond and create an uneven finish.
Cut the tape into manageable lengths, slightly longer than the joint or crack being covered. The tape should be centered over the joint, with an equal amount extending on either side. Press the tape onto the surface, starting from one end and working your way to the other, ensuring it is firmly embedded in the joint compound.
To smooth out the tape and remove any excess joint compound, use a taping knife or a drywall finishing tool. Hold the tool at a slight angle and apply even pressure as you glide it along the tape. This process helps to feather the edges and create a seamless transition between the tape and the drywall surface.
Preparing for the Job
Before you begin taping, it is essential to properly prepare the area for work. Follow these steps to ensure a smooth and efficient process:
- Gather Your Tools: Make sure you have all the necessary tools within reach, including a taping knife, joint compound, sandpaper, and a mud pan
- Taping knife (4 to 6 inches)
- Joint compound
- Sandpaper (120 grit)
- Mud pan
- Inspect the Drywall: Carefully examine the drywall surface for any imperfections, such as cracks or loose seams
- Look for cracks
- Check for loose seams
- Make Necessary Repairs: If you spot any issues, fix them with drywall compound and a putty knife before proceeding
- Apply drywall compound
- Smooth with putty knife
Using the Right Tools and Materials for Efficient and Effective Taping
When it comes to drywall taping, using the right tools and materials is crucial for achieving a professional-looking finish. Whether you are a seasoned professional or a DIY enthusiast, having the proper equipment will make the taping process easier and more efficient. In this article, we will discuss the importance of using the right tools and materials and how they can help you avoid common drywall taping mistakes.
One of the essential tools for drywall taping is a quality taping knife. These knives come in various sizes, such as 4-inch, 6-inch, and 12-inch, and each serves a different purpose during the taping process. The smaller knives are perfect for applying joint compound to narrow joints and corners, while the longer knives are ideal for smoothing out wider seams. Investing in high-quality taping knives will ensure clean, smooth joints and minimize the need for excessive sanding or rework.
Another crucial tool for efficient taping is a mud pan. This shallow, rectangular container holds the joint compound while you work. It is essential to choose a sturdy and well-designed mud pan that allows for easy access to the joint compound and easy cleanup afterward. A mud pan with rounded corners and a tapered edge will help create a smooth flow of compound onto the taping knife, preventing excess build-up and ensuring even application.
In addition to taping knives and mud pans, having a good-quality joint compound is essential for achieving seamless drywall joints. There are different types of joint compounds available, such as the lightweight variety for easier application and sanding, and the all-purpose compound for a stronger bond. Choosing the right type of joint compound will depend on the specific needs of your project. It is also important to properly mix the compound according to the manufacturer’s instructions to achieve the desired consistency.
Aside from tools, using the right materials is equally important for efficient taping. Using high-quality drywall tape will ensure that the joints remain intact and prevent cracks from forming over time. There are different types of drywall tape available, including paper tape and self-adhesive mesh tape. While both can be effective, it is crucial to follow the manufacturer’s recommendations and apply the tape properly to avoid any adhesion issues or peeling.
Taping Techniques
Now that you have prepared the area, let’s move on to the taping techniques that will give your walls a professional finish:
1. Applying the Tape
- Measure and Cut the Tape: Measure the length of the joint and cut the tape to fit
- Measure joint length
- Cut tape to size
- Apply the Tape: Press the tape firmly onto the joint, starting from one end and working your way to the other
- Press tape onto joint
- Smooth Out Air Bubbles: Use a taping knife to smooth out any air bubbles or wrinkles in the tape
- Smooth out air bubbles
2. Applying Joint Compound
- Load the Taping Knife: Load the taping knife with joint compound from the mud pan
- Load knife with joint compound
- Apply the Compound: Starting at one end of the joint, apply a thin layer of joint compound over the tape
- Apply thin layer of compound
- Feathering Technique: Using a slight angle, feather the compound along the edges of the joint to create a seamless finish
- Feather compound along edges
- Repeat the Process: Continue the process on all joints, making sure to maintain a consistent layer of compound
- Repeat on all joints
3. Sanding and Finishing
- Allow Drying Time: Let the joint compound dry completely according to the manufacturer’s instructions
- Follow drying time instructions
- Sand the Surface: Use 120-grit sandpaper to sand the dried compound until it is smooth and flush with the wall
- Sand with 120-grit paper
- Inspect and Touch Up: Inspect the surface for any imperfections and touch up as needed with additional joint compound
- Inspect for imperfections
- Final Sanding: Lightly sand the patched areas to blend them seamlessly with the surrounding wall or ceiling
- Lightly sand patched areas
Common Drywall Taping Mistakes and Their Impact on the Quality of the Finished Project
When it comes to drywall installation, the taping process plays a crucial role in achieving a smooth and seamless finish. However, even experienced contractors can make mistakes that can negatively impact the overall quality of the project.
One common mistake in drywall taping is using the wrong tools and materials for taping. Investing in high-quality tools such as a taping knife, joint compound, and sanding block is important to achieve professional results. Using low-quality tools can make it difficult to apply the tape evenly and result in an uneven finish. Similarly, using the wrong type or size of tape can also lead to issues. It is essential to choose the appropriate tape for the job, whether it be paper tape or a self-adhesive mesh tape, and ensure it is wide enough to cover the joint properly.
Achieving smooth and seamless drywall joints is another challenge that many people face. One common mistake is applying too much joint compound, resulting in thick, visible seams. Conversely, applying too little compound can lead to weak adhesion and visible gaps. The key is to apply an even layer of compound, feathering it out along the edges to create a smooth transition. Sanding the joints between coats is also crucial for achieving a seamless finish.
Furthermore, overlooking proper dry time between coats is a mistake that can compromise the quality of the taping job. Rushing the process and not allowing each layer of joint compound to dry fully can result in cracks and shrinking, which will be visible once the surface is painted. It is important to follow the manufacturer’s recommended drying time between coats and ensure each layer is fully dry and sanded before proceeding.
Lastly, neglecting to inspect the finished taping job is a common oversight. It is important to thoroughly inspect the joints for any imperfections, such as visible seams or air bubbles, before proceeding to the next step, such as priming and painting. Catching these mistakes early on allows for easier repairs and ensures a professional-looking finish.
Tips for Success
To achieve professional-grade results, keep these tips in mind:
- Use a high-quality taping knife to ensure precise application
- Work in layers, applying multiple thin coats of joint compound for a flawless finish
- Practice feathering technique to achieve seamless transitions between compound and wall
- Clean your tools thoroughly after each use to maintain their effectiveness
- Take breaks and step back periodically to assess the overall progress and make necessary adjustments.
Conclusion
In order to achieve a high-quality finished project, it is crucial to avoid common drywall taping mistakes. These mistakes can greatly impact the overall appearance and durability of the walls. By understanding the potential pitfalls and knowing how to avoid them, homeowners and contractors alike can ensure a professional-looking finish that will stand the test of time.
One of the first steps in avoiding common drywall taping mistakes is properly preparing the drywall surface before applying the tape. This includes ensuring that the surface is clean and free of dust, debris, and grease. A clean surface allows the tape to adhere properly, preventing issues such as peeling or cracking down the line. It is also important to ensure that any loose or damaged drywall is repaired before beginning the taping process.
Using the right tools and materials is another crucial aspect of successful drywall taping. Investing in high-quality tools, such as a taping knife and a mud pan, can make a significant difference in the ease and efficiency of the taping process. Additionally, using the correct type and consistency of joint compound is essential for achieving seamless and durable joints. It is important to follow the manufacturer’s guidelines when selecting and applying joint compound to ensure optimal results.
Technique plays a major role in achieving smooth and seamless drywall joints. Applying too much pressure or not enough pressure when applying tape and joint compound can result in visible seams or uneven surfaces. The key is to apply an even layer of joint compound and feather it out along the edges to create a seamless transition between the taped areas and the surrounding drywall. Sanding between coats and using a light touch can also help to achieve a professional-looking finish.
To prevent costly repairs or rework in the future, it is important to avoid common pitfalls during the taping process. One common mistake is applying too many layers of joint compound without allowing sufficient drying time between coats. This can lead to cracking and instability. It is also important to avoid over-sanding, as this can weaken the joint compound and compromise the integrity of the finished surface. Additionally, neglecting to prime the freshly taped and sanded areas before painting can result in poor paint adhesion and a less appealing finish.
In conclusion, avoiding common drywall taping mistakes is essential for achieving a high-quality finished project. By properly preparing the drywall surface, using the right tools and materials, employing proper technique, and avoiding common pitfalls, homeowners and contractors can ensure a professional-looking finish that will withstand the test of time. Taking the time and care to avoid these mistakes is well worth the effort, as it will ultimately lead to a durable and aesthetically pleasing result.