Techniques for Drywall Taping
Table of Contents
Drywall Taping Techniques
Drywall taping techniques are essential for achieving a flawless finish in any construction or renovation project. The tape plays a important role in reinforcing the seams between drywall panels, preventing cracks and creating a smooth surface for painting or finishing. Neglecting proper taping methods can lead to visible imperfections, such as bulges, ridges, or tape lines, detracting from the overall aesthetic of the walls or ceilings. Therefore, mastering the art of drywall taping is fundamental for ensuring professional results and enhancing the durability of the surfaces.
Meticulous attention to detail and precision are paramount when it comes to drywall taping. From selecting the right type of tape to applying it with care and accuracy, every step in the taping process contributes to the final outcome. By mastering proper taping techniques, construction professionals and DIY enthusiasts alike can achieve seamless joints and corners, creating a polished look that reflects a commitment to quality craftsmanship. Additionally, understanding the importance of proper taping techniques can save both time and resources by minimizing the need for extensive repairs or rework.
Understanding the Role of Drywall Tape
Drywall tape plays a crucial role in achieving seamless and flawless results in drywall finishing. It serves as a reinforcement for the joints between drywall panels, preventing cracks and minimizing the visibility of seams. Properly applied drywall tape creates a smooth transition between different sections of drywall, ensuring a uniform surface for further finishing work.
Choosing the appropriate type of drywall tape for your project is essential in achieving professional results. Paper tape, mesh tape, and fiberglass tape each have unique characteristics that cater to specific needs. Understanding the differences and knowing when to use each type will contribute significantly to the overall quality of the finished drywall surface. By selecting the right drywall tape and applying it with precision, you set the foundation for a flawless finish that enhances the aesthetic appeal of the space.
Before Beginning the Taping Process
When embarking on a drywall taping project, several crucial factors must be taken into consideration before diving into the taping process. Firstly, it is essential to assess the condition of the drywall surface, ensuring it is clean, dry, and free of any imperfections that could affect the taping outcome. Any existing damage or irregularities should be rectified beforehand to achieve a smooth and flawless finish.
Secondly, selecting the appropriate type of drywall tape is paramount to the success of the taping process. Consider factors such as the size of the joints, corners, and the level of durability required for the project. Choosing between paper tape, fiberglass mesh tape, or self-adhesive tape can significantly impact the quality and longevity of the taping results. Additionally, having the necessary tools, such as a taping knife, mud pan, and joint compound, readily available before commencing the taping process is crucial for a seamless workflow and professional outcome.
Choosing the Right Type of Drywall Tape for Your Project
When selecting the appropriate type of drywall tape for your project, it is crucial to consider the specific needs and requirements of the job at hand. Mesh tape, made of fiberglass, is a popular choice for its flexibility and ease of use. It is ideal for reinforcing joints and preventing cracks in high-stress areas. Paper tape, on the other hand, is known for its durability and ability to blend seamlessly with drywall mud, making it suitable for achieving smooth finishes on flat surfaces. Additionally, paper tape is less prone to edge wrinkling, which can be a common issue with mesh tape if not applied correctly.
Another option to consider is composite tape, which combines the benefits of both mesh and paper tapes. Composite tape offers the strength of fiberglass mesh with the smooth finish of paper tape, providing a versatile solution for various taping needs. It is important to assess the specific demands of your project, such as the type of joint, the level of stress it will endure, and the desired finish, in order to determine the most suitable type of drywall tape to achieve professional results.
Preparation Steps for Ensuring a Smooth Taping Process
Proper preparation is crucial to achieving a flawless result when taping drywall. Begin by ensuring that the drywall surface is clean and free of any dust, debris, or residue that could affect the adhesion of the tape. Use a dry cloth or a vacuum with a brush attachment to remove any particles from the surface. It’s essential to have a smooth and even surface to work on for the tape to adhere properly.
Next, inspect the drywall seams and joints for any irregularities or damage that may need to be repaired before taping. Use a joint compound or spackling paste to fill in any gaps or holes and allow it to dry completely before proceeding with the taping process. Additionally, consider applying a coat of primer to the drywall before taping to ensure better adhesion and a smoother finish. By following these preparation steps diligently, you can set a strong foundation for a successful taping process and achieve professional-looking results.
Techniques for Applying Drywall Tape
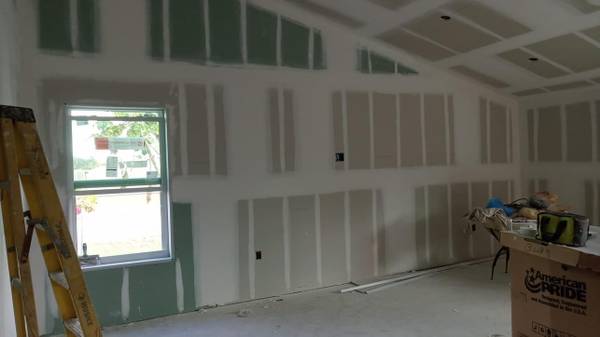
To ensure a flawless finish on your drywall project, mastering the art of applying drywall tape with precision and efficiency is paramount. Begin by cutting the appropriate length of tape for each seam, ensuring a snug fit without overlapping. Press the tape firmly into the joint using a drywall knife, smoothly running it along to eliminate any air bubbles or creases. Pay close attention to corners and edges, where proper application is crucial for seamless results.
Next, apply a thin layer of joint compound over the taped seams, feathering the edges outward to blend with the surrounding surface. Use a taping knife to smooth and level the compound, working in a continuous motion to create a uniform finish. Remember to remove any excess compound to avoid unnecessary sanding later on. Repeat the process for each seam, allowing sufficient drying time between coats for optimal adhesion. Mastering these techniques will not only enhance the aesthetic appeal of your project but also contribute to its structural integrity.
Common Mistakes to Avoid When Taping Drywall
One common mistake to avoid when taping drywall is failing to properly prepare the surface before applying the tape. Neglecting to clean the area, remove debris, and ensure the drywall is smooth can lead to adhesion issues and an uneven finish. It is crucial to take the time to address any imperfections and create a clean, flat surface for the tape to adhere to effectively.
Another mistake to steer clear of is using too much joint compound when embedding the tape. While it may be tempting to apply a thick layer for extra reinforcement, excessive joint compound can result in unsightly bulges and ridges that are difficult to sand down later. It is essential to use a conservative amount of compound to embed the tape smoothly and avoid unnecessary buildup that can compromise the final appearance of the taping job.
Tips for Achieving Seamless Joints and Corners
For achieving seamless joints and corners in your drywall taping project, one crucial tip is to ensure that your tape is properly embedded in joint compound. This can be done by applying an even layer of joint compound over the tape, using a taping knife to gently press it into the seams. Proper embedding helps to create a strong bond between the tape and the drywall, preventing cracks and bubbles from appearing later on.
Another important tip is to feather the edges of your joint compound when applying it over the tape. Feathering involves tapering out the edges of the compound to create a smooth transition between the taped area and the rest of the wall. This technique helps to blend the joints and corners seamlessly, resulting in a professional-looking finish. Remember to feather out the compound in multiple thin layers, allowing each layer to dry before applying the next for optimal results.
The Role of Sanding in Achieving a Professional Finish
Sanding plays a crucial role in achieving a professional finish when taping drywall. Once the joint compound has dried and the tape is in place, sanding is necessary to smooth out any imperfections and create a seamless surface. It is essential to use the proper tools for sanding, such as sanding blocks or sandpaper, to ensure a uniform and polished result. Without the process of sanding, even the most meticulously applied drywall tape may appear rough and irregular, detracting from the overall quality of the finished project.
In addition to creating a smooth surface, sanding also helps to blend the taped joints seamlessly into the surrounding drywall, creating an invisible transition between sections. This meticulous attention to detail is what separates a professional finish from a rushed or amateur job. By taking the time to properly sand the taped areas, ensuring they are flush with the rest of the wall, you can achieve a flawless result that enhances the overall appearance of the room. Sanding is a critical step in the taping process that should not be overlooked if you strive for a high-quality finish in your drywall project.
Using Primers and Sealers to Enhance Taping Results
Applying primers and sealers is a crucial step in the drywall taping process that should not be overlooked. Primers create a uniform surface by sealing the drywall, allowing the tape and joint compound to adhere effectively. They also help prevent flashing or joint banding, which can be particularly noticeable under certain lighting conditions. By enhancing the bond between the drywall and tape, primers play a key role in achieving smooth and flawless taping results.
Sealers, on the other hand, are essential for controlling the absorption of subsequent layers of joint compound. By evenly sealing the surface, sealers prevent uneven drying of the joint compound, reducing the likelihood of visible imperfections such as bubbling or cracking. This results in a more consistent finish and facilitates easier sanding and painting, ultimately contributing to a professional-quality outcome. When used in conjunction with proper taping techniques, primers and sealers are invaluable tools for enhancing the overall appearance and durability of your drywall project.
Troubleshooting Common Taping Issues and Imperfections
To troubleshoot common taping issues and imperfections, start by addressing any bubbling or blistering of the tape. This can be caused by insufficient adhesive application or trapped air during the taping process. To fix this, carefully cut out the affected area, reapply fresh tape, and ensure proper smoothing and feathering for seamless integration. Additionally, if you encounter wrinkling or sagging tape, it may be due to excessive moisture or improper drying conditions. To remedy this, gently remove the affected tape, allow the area to dry completely, and reapply the tape using appropriate pressure and techniques for a flat finish.
Another common issue to troubleshoot is tape that has lifted or peeled away from the drywall surface. This can occur if the tape was not properly pressed into the joint compound or if the compound was too wet when taping. To rectify this, gently remove the loose tape, apply a fresh coat of joint compound, and securely embed the tape into the compound using a taping knife. Ensure proper drying time before sanding and finishing the repaired area to achieve a professional result. Remember, attention to detail and precision in troubleshooting these common taping issues will result in a flawless finish for your drywall project.
How to Properly Inspect and Evaluate Finished Taping Results
To ensure a high-quality finish, it is imperative to meticulously inspect and evaluate the completed drywall taping job. Begin the evaluation process by examining the taped joints and corners for any visible imperfections, such as bulges, gaps, or uneven surfaces. Run your hand over the taped areas to feel for any inconsistencies in texture or bumps that may require further attention. Proper lighting is crucial during this inspection stage to detect any flaws that may not be immediately visible.
Once the visual inspection is completed, it is essential to evaluate the overall smoothness and seamless integration of the taped joints and corners. Use a drywall knife or putty knife to gently scrape across the taped areas to test for firm adhesion and proper feathering of the joint compound. Any areas that sound hollow or loose should be marked for remedial action. Additionally, check the angles and edges of the joints to ensure they blend seamlessly with the surrounding drywall surface. Remember, meticulous evaluation is key to achieving impeccable results in your taping projects.
The Benefits of Hiring a Professional for Complex Taping Projects
Hiring a professional for complex taping projects offers numerous benefits that can streamline the process and ensure high-quality results. Professionals bring a wealth of experience and expertise to the table, allowing them to tackle intricate taping tasks with precision and efficiency. Their in-depth knowledge of proper techniques and best practices enables them to navigate challenges and deliver flawless finishes that stand the test of time.
Moreover, professionals have access to specialized tools and equipment that are essential for achieving professional-grade results. From advanced taping tools to high-quality materials, they come equipped with everything needed to complete complex taping projects efficiently and effectively. By entrusting your project to a skilled professional, you can save time and effort while enjoying the peace of mind that comes with knowing your taping needs are in capable hands.
Resources and Tools for Improving Your Drywall Taping Skills
For those looking to enhance their drywall taping skills, investing in the right resources and tools is crucial. One essential tool that can greatly improve taping efficiency and precision is a high-quality taping knife. Available in various sizes and materials, selecting the right taping knife can make a significant difference in achieving smooth and seamless results. Additionally, having a durable drywall banjo or mud dispenser can streamline the taping process by allowing for quick and consistent application of joint compound along drywall seams.
In addition to tools, utilizing resources such as online tutorials, instructional books, and workshops can provide valuable insights and techniques for mastering the art of drywall taping. Online forums and communities dedicated to drywall finishing can also offer a platform for sharing experiences, troubleshooting common issues, and learning from seasoned professionals in the field. By leveraging these resources and tools, individuals can sharpen their taping skills and produce professional-quality results on their drywall projects.
Continuing Education and Training Opportunities in Drywall Taping.
As professionals in the construction industry, staying updated with the latest techniques and trends in drywall taping is essential for ensuring high-quality results. Continuing education and training opportunities provide an avenue for individuals to enhance their skills and expertise in this specialized field. By participating in workshops, seminars, or online courses focused on drywall taping, professionals can learn new methods, tools, and industry best practices that can elevate their craftsmanship to the next level.
Moreover, ongoing education in drywall taping not only improves the quality of work but also opens up new avenues for career advancement. Many training programs offer certifications that can enhance credibility and marketability in the industry. By investing in continuous learning and skill development, professionals can set themselves apart from their peers and secure opportunities for growth and success in the competitive field of construction.

